RSS

Tag Archives: Cheese

Recipe: Bob Armstrong Dip

Bob Armstrong Dip

Bob Armstrong Dip

WARNING: Prepare the following recipe with extreme caution. Symptoms of serving this recipe include: foodgasms, overeating, chip disappearance, double dipping, eyes rolling back and generally euphoria.

Now that I’ve posted a full disclaimer, this is one of the best dips in the world. I was first introduced to Bob Armstrong Dip while eating at Mattito’s restaurant in Dallas. It’s not on the menu — something I full understand so the restaurant soundtrack doesn’t consist of When Harry Met Sally moments. Anyway, enjoy!

Ingredients:

For the guacamole:

  • 4 avocados, chopped and mashed
  • 1 lime, juiced
  • 2 TBSP olive oil
  • 1 garlic clove, finely chopped
  • 1/4 cup fresh jalapeño, chopped
  • 1/2 red onion, diced
  • 1/2 cup fresh cilantro, chopped
  • Salt and pepper, to taste

Bob Armstrong Dip

Bob Armstrong Dip is a combo of guacamole, chile con queso and taco meat.


For the taco meat:

  • 1 red bell pepper, finely chopped
  • 2 celery stalks, finely chopped
  • 1/2 red onion, diced
  • 1 pound ground beef
  • 1 TBSP cumin
  • 1 TBSP garlic powder
  • 1/2 TBSP salt
  • 1/2 TBSP ground black pepper

For the chile con queso:

  • 1 can tomatoes with green chilies
  • 2 celery stalks, finely chopped
  • 3/4 cup reserved liquid from ground beef
  • 1 pound 2% milk Velveeta cheese
  • 1 TBSP cumin
  • 1 TBSP garlic powder
  • 1/2 TBSP salt
  • 1/2 TBSP ground black pepper

Bob Armstrong Dip

You’ll get a lot closer to Bob Armstrong Dip than this.


Directions:

  1. In a large bowl, mix together all guacamole ingredients and chill.
  2. In a large skillet, stir in bell pepper, celery, onion and spices from taco meat ingredients. Spread uncooked ground beef on top.
  3. Cook over medium heat until meat starts to simmer then break up meat and simmer on low for about 20 minutes. Remove from heat and set aside.
  4. Drain liquid from cooked ground beef and reserve for chile con queso.
  5. In a sauce pan, combine all ingredients for chile con queso except the cheese.
  6. Bring to a light simmer and gently simmer for about 5 minutes.
  7. Turn down heat and add cheese. Simmer until cheese is melted.
  8. Warm a 9×13 inch casserole dish or pan.
  9. Spread guacamole into the pan, then add the taco meat, and top with chile con queso. Stir well to incorporate all ingredients.
  10. Serve with plenty of chips.

To keep this Bob Armstrong Dip warm, you can place it in the oven at 250F.

This is supposed to be served as an appetizer, but you may want to plan to serve it as an entree. It’s impossible to resist the dip known as Bob Armstrong Dip. Get ready to have your mind blown by this Tex-Mex concoction. It’s worth every bite.

 
3 Comments

Posted by on September 25, 2012 in Appetizers, Cookin', Recipes


Tags: , , , , , , , , , , ,

Recipe: Sour Cream Chicken Enchiladas

Sour Cream Chicken Enchiladas

Sour Cream Chicken Enchiladas

I must confess I really miss good Tex-Mex cuisine. Living in Texas for 11 years definitely spoiled me. And as much as I love New Orleans, it’s not a hot spot for Tex-Mex.

So I have to do it myself. Last week I had a very specific craving for Sour Cream Chicken Enchiladas so I made some. Here’s my recipe.

Ingredients:

  • 2 1/2 cooked chicken meat, shredded
  • 2 cups chicken broth
  • 3 TBSP vegetable oil
  • 1 jalapeño, seeded and diced
  • 1 dozen corn tortillas
  • 2 cans diced green chillies (4-ounce cans)
  • 1 red onion, diced
  • 1/2 cup heavy whipping cream
  • Chicken Enchilada Filling

    Chicken Enchilada Filling

  • 2 TBSP flour
  • 2 TBSP paprika
  • 1 cup sour cream
  • 2 TBSP butter
  • 1/2 cup cilantro, chopped
  • 3 cups shredded cheese (Cheddar, Pepper Jack or Monterey Jack)
  • Salsa (optional)
  • Salt and pepper to taste

Directions:

  1. Preheat oven to 350F and grease a 9×13 casserole dish.
  2. Heat 2 TBSP vegetable oil in a small skillet over medium-high heat. Fry tortillas for 10 seconds on each side. Then place them on a paper towel-lined plate to drain.
  3. In a separate skillet, heat 1 TBSP vegetable oil over medium heat. Saute onion and jalapeño for 1 minute.
  4. Add chicken, 1 can of the green chillies and 1 TBSP paprika. Stir together.
  5. Sour Cream Chicken Enchiladas Before Baking

    Sour Cream Chicken Enchiladas Before Baking

  6. Add heavy cream and 1/2 cup chicken broth and stir. Allow mixture to bubble and get hot then turn off heat and set aside.
  7. In a separate large skillet, melt butter over medium heat and add in flour. Whisk together and cook for a minute or two.
  8. Pour in remaining chicken broth, whisk together and cook for an additional one to two minutes.
  9. Stir in remaining can of green chillies, reduce heat to low and add sour cream. Add 1 1/2 cups shredded cheese and stir to melt.
  10. Add 1 TBSP paprika and salt and pepper to taste.
  11. To assemble, spoon chicken mixture on to tortillas, individually. Top with cheese then roll. Place rolled enchiladas seam side down in 9 x 13 casserole dish.
  12. Pour cheese mixture on top of prepared enchiladas. Top with any remaining cheese you have.
  13. Bake for 30 minutes. Then let cool slightly, top with chopped cilantro and serve.

Feel free to add in more green chillies or jalapeño if you want a spicier version. These can be made ahead and reheated before serving. I served mine with refried black beans, half a sliced avocado and of course a fresh margarita.

These definitely conquered my craving, but I wish more New Orleans Tex-Mex options were available. Until then, I’ll have to make my own Tex-Mex.

 
2 Comments

Posted by on July 24, 2012 in Cookin', Entrees, Recipes


Tags: , , , , , , , ,

Recipe: Bacon Cheddar Biscuits

Bacon Cheddar Biscuit Dough

Bacon Cheddar Biscuit Dough

Biscuits from scratch can seem like a fairly daunting task. But don’t worry, this Bacon Cheddar Biscuit recipe is simple and you can go from step 1 to a finished batch in 45 minutes (cooking time included).

Rather than making plain biscuits, I added some bacon and cheddar to make this extra tasty. Feel free to add more cheese or more bacon if you so desire.

Ingredients

  • 6 slices bacon, diced
  • 1/2 cup shredded cheddar cheese
  • 1 3/4 cup flour
  • 2 TBSP cornmeal
  • 2 tsp baking powder
  • 1/2 tsp baking soda
  • 1 1/2 tsp sugar
  • 1 cup milk (I used 2%)
  • Frying Bacon

    Frying Bacon

  • 1 TBSP salt
  • 1 TBSP pepper
  • 1/4 cup chives, minced
  • 1 stick unsalted butter, frozen

Directions:

  1. Preheat oven to 450F.
  2. In a cast iron skillet, fry bacon until just crispy. Remove bacon with a slotted spoon and drain on a paper towel. Discard or reserve all of bacon grease except for 1 tablespoon and set the skillet aside.
  3. Bacon Cheddar Biscuits

    Bacon Cheddar Biscuits

  4. Whisk all the dry ingredients in a medium bowl. Use a grater to shred butter and toss in with dry ingredients. Using a fork, cut the butter into the flour until pea-sized crumbs form.
  5. Stir in the bacon, cheese, chives and milk. Using a fork, mix until no dry flour remains.
  6. Sprinkle some flour on a clean counter and dump the dough on it. Sprinkle some more flour on top and using your hands, pat the dough into a circle about 1/2- to 1-inch thick. Use a biscuit cutter or other round item (such as a jar or glass) to cut out biscuit shapes. Transfer cut dough to the skillet. Reform remaining dough and cut more biscuits until no dough remains.
  7. Bake the biscuits for 18-20 minutes or until a toothpick inserted in the middle comes out clean.
  8. Let biscuits cool for 5 minutes, then serve.

These biscuits go great with most meals. They’re especially an awesome way to make a breakfast biscuit sandwich.

No matter how you consume them, you can store them in a sealed container for several days. If you have any left over, that is.

 
1 Comment

Posted by on December 14, 2011 in Cookin', Recipes, Sides


Tags: , , , ,

Review: St. James Cheese Company

Beecher's Cheddar

Beecher's Cheddar

I’m spoiled when it comes to good cheese thanks to St. James Cheese Company being located only two blocks from my house. It’s always a treat to stop in whether it’s for lunch or to pick up some cheese.

Another big reason for a visit is the weekly cheese classes. For $20, you get six samples of cheese and six sample glasses of wine (or beer). It’s a great deal, plus, it’s educational.

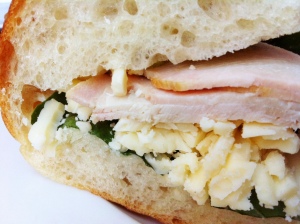
Aside from the great weekly classes, the prepared food is another highlight for St. James Cheese Company. On my last visit, I had the Beecher’s Cheddar, a smoked turkey sandwich on ciabatta with fresh basil, tomato and avocado. I got mine with no tomato, but it’s a a great sandwich with come complex flavors that come from simple ingredients.

One of the best salads is the Manchego. It’s a bed of arugula with almonds and pear with a quince vinaigrette. It’s probably my second favorite salad to the summer salad that comes with prosciutto and peaches.

Manchego Salad

Manchego Salad

The Ploughman’s Lunch is another great option that gets you a little bit of everything: three cheeses, pork pie, salad, bread and chutney. It’s one of the best things on the menu.

If you only stop in to grab and go, this is your place for cheese. In fact, the best cheese I’ve ever had came from St. James Cheese Company. Called Humboldt Fog, a goat’s milk cheese that described as “creamy and luscious with a subtle tangy flavor.” If you can’t decide on a cheese, just ask one of the cheesemongers for advice and they’ll hook you up with one appropriate for you event or wine pairing.

St. James Cheese Company really has it all when it comes to cheese. Whether you stop in for lunch, to grab and go, or for a cheese class, you’ll leave satisfied and with a full belly.

St. James Cheese Company is located at 5044 Prytania St. in Uptown New Orleans. Their hours are 11 a.m.-6 p.m. Mon.-Thurs., 11 a.m.-8 p.m. Fri. and 11 a.m.-4 p.m. Sun.

 
Leave a comment

Posted by on December 5, 2011 in Eatin'


Tags: , , , , ,