RSS

Tag Archives: Baking

Recipe: Nutella Swirl Pound Cake

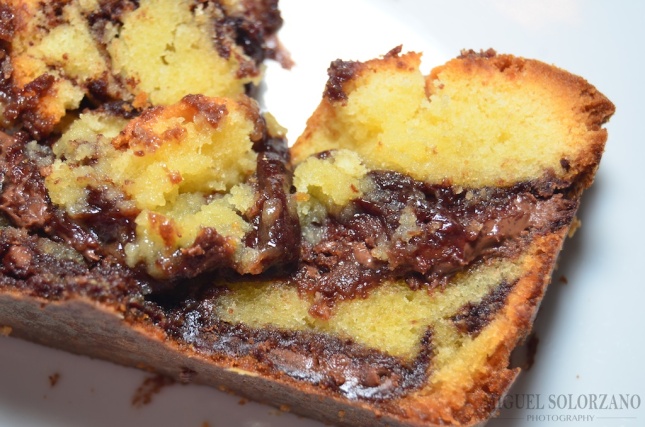
Nutella Swirl Pound Cake


Love Nutella? Welcome to the club! Not a fan of Nutella? I’m not even sure what to say to you and this recipe isn’t for you.

If you are part of the club, you’ll love this recipe for Nutella Swirl Pound Cake. Talk about delicious, rich and decadent.

Ingredients:

  • 1 1/2 cups all-purpose flour
  • 2 sticks unsalted butter, softened
  • 4 large eggs
  • 1 1/2 TBSP cocoa powder
  • 2 tsp vanilla extract
  • 1 1/4 cup sugar
  • 1/4 tsp salt
  • 1 jar of Nutella (13 oz.)
  • 1 tsp baking powder

Directions:

    1. Preheat the oven to 325°.
    2. Grease a 9×5-inch loaf pan.
    3. In a small bowl, whisk the eggs with vanilla extract.
    4. In a medium bowl, whisk the flour, cocoa powder, baking powder and salt.

Who doesn’t love Nutella?

  1. In a large bowl, beat the butter with the sugar until fluffy.
  2. Gradually beat in the egg mixture until full incorporated.
  3. In three batches, beat in the flour mixture until incorporated.
  4. Spread 1/3 of the batter into the loaf pan then spread half the Nutella on top. Repeat with another 1/3 of the batter and the remaining Nutella. Top with the remaining 1/3 of the batter.
  5. Lightly swirl the Nutella into the batter with a knife. Careful not to overmix.
  6. Bake the cake for approximately 1 hour and 15 minutes, until a toothpick inserted in the center comes out clean. Let the cool in the pan for 15 minutes.
  7. Invert the cake onto a wire rack or plate, turn it right side up and let cool completely, about 2 hours. Cut the cake into slices and serve.

Letting the Nutella Swirl Pound Cake cool for those two long, grueling hours while you salivate and smell the deliciousness is going to be the hardest part.

This is one of the best pound cakes I’ve ever had. I had two servings on the spot. You don’t need to garnish it with anything. It’s good enough to devour all on its own.

 
8 Comments

Posted by on May 17, 2017 in Cookin', Desserts, Recipes


Tags: , , , , , ,

Recipe: Meyer Lemon Squares

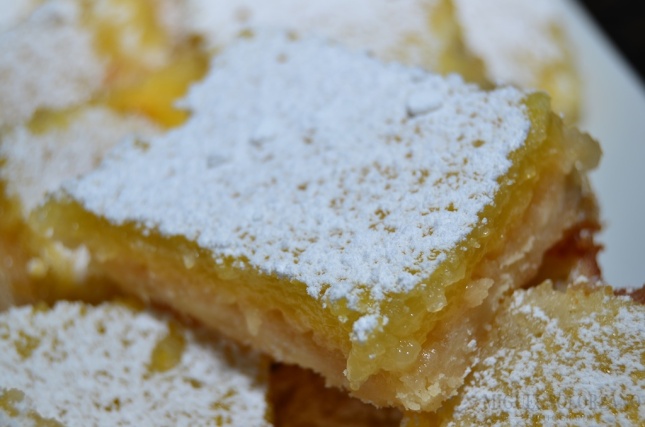
Meyer Lemon Squares

Meyer Lemon Squares


With winter upon us, it’s time for citrus to take center stage as things like oranges, lemons and limes come into season. I was able to pick up some Meyer Lemons from Hollygrove Market and Farm in last weekend’s box.

Meyer Lemon Squares

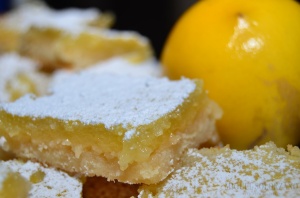
Dust the Meyer Lemon Squares with powdered sugar before serving.

So what did I do with them? I turned them into delicious Meyer Lemon Squares.

Ingredients:

  • Juice from 2 Meyer lemons
  • 1 1/2 sticks unsalted butter
  • 1 1/2 cups sugar
  • 1 1/2 cups plus 1 TBSP plus 1 tsp flour
  • 1/2 cup powdered sugar (plus more for dusting)
  • 4 eggs
  • 2 TBSP grated Meyer lemon peels

Directions:

    1. Preheat the oven to 350°.
    2. Combine 1 1/2 cups flour and 1/2 cup powdered sugar in large bowl.
    3. Add butter and cut in until mixture resembles coarse meal.
    4. Press crust into a 13x9x2-inch baking dish.
    5. Bake until golden brown (about 25-30 minutes).
Meyer Lemon Squares

These Meyer Lemon Squares are great for the holidays.

  1. Remove from oven, but leave oven on 350.
  2. Beat sugar, eggs, Meyer lemon juice, 1 TBSP plus 1 tsp flour and lemon peel in medium bowl to blend.
  3. Pour into crust then bake until mixture is set, about 20 minutes.
  4. Once set, remove from oven to let cool.
  5. Cut into 24 individual squares then sift powdered sugar over top before serving.

These Meyer Lemon Squares should bake to a nice, pillowy consistency. The great thing about using Meyer lemons is that they don’t end up too sour. You can use additional lemon peel in the mixture if you want them more sour.

Give these Meyer Lemon Squares a try at your next holiday function. They definitely deserve a place next to the pecan pie and the pumpkin pie.

 
6 Comments

Posted by on January 18, 2017 in Desserts, Recipes


Tags: , , , , , , ,

Recipe: Pineapple-Coconut Upside-Down Cake

Coconut-Pineapple Upside-Down Cake

Coconut-Pineapple Upside-Down Cake

I was nervous when I made this Pineapple-Coconut Upside-Down Cake. Why? Admittedly, I’m not the best baker although I’m getting a lot better. Also, I was cooking this as a birthday cake for my mom so no pressure or anything.

Turns out my worrying was unwarranted. This cake is moist, delicious and full of tropical flavor. I made it while I was on vacation so I didn’t have access to my iron skillet, but I’m sure using it would have taken it to another level. That said, the level this cake is on is already pretty high.

Ingredients:

For the topping:

  • 6 TBSP unsalted butter
  • 1 cup, packed light brown sugar
  • 1 can of pineapple rings in pineapple juice(you won’t use them all)
  • 2 TBSP Malibu coconut rum
  • 1/2 tsp salt
  • Coconut-Pineapple Upside-Down Cake

    Coconut-Pineapple Upside-Down Cake Close-Up

For the cake:

  • 1 stick unsalted butter, softened
  • 1 cup sugar
  • 3 eggs
  • 2 tsp vanilla extract
  • 1 1/2 cup all-purpose flour
  • 2 tsp baking powder
  • 2 tsp cardamom
  • 1/2 cup unsweetened pineapple juice
  • 1/2 tsp salt
  • 1/4 cup coconut flakes, plus another 1/4 cup toasted coconut flakes

Directions:

  1. Preheat oven to 350F.
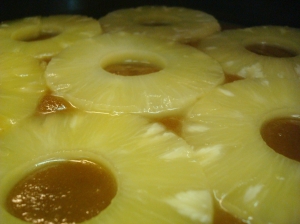
  2. For the Topping: Melt the butter in a well seasoned 9” cast-iron skillet or pot (if using cake pan), over medium-high heat. Melt the brown sugar with salt, stirring constantly, until bubbling, about 6 minutes. Remove from heat, add pineapple rings in one even layer in skillet or round cake pan, and set aside.
  3. Coconut-Pineapple Upside-Down Cake Topping

    The topping for Coconut-Pineapple Upside-Down Cake

  4. Mix the butter in a large bowl until light and fluffy. Add the sugar and beat until creamy.
  5. Add the eggs, one at a time, beating well after each addition.
  6. Add 1/4 cup coconut flakes and stir in. Beat in vanilla and Malibu coconut rum.
  7. In a separate bowl, combine the flour, cardamom, baking powder, and salt. Add half of the flour mixture to the egg mixture and beat on low speed just until blended.
  8. Add the pineapple juice and mix to incorporate, add remaining flour mixture, beating until just incorporated.
  9. Spoon the batter over the pineapple/brown sugar topping, smoothing the top evenly.
  10. Bake on the center rack of the oven until golden brown and a skewer inserted in the middle comes out clean, 45 minutes to 1 hour. Remove from the oven and let stand for 5 minutes.
  11. To remove from the skillet, run a sharp knife around the edge to release the sides. Invert a cake plate or service platter over the skillet and invert the cake onto the plate, keeping pan and plate firmly pressed together. The cake should drop from the skillet onto the plate.
  12. Drizzle the cake with additional Malibu coconut rum, top with toasted coconut flakes, and serve.

I made this Pineapple-Coconut Upside-Down Cake while I was on vacation at the beach and it really fit the bill for a beach birthday.

If you’re a fan of coconut and/or pineapple this is the cake for you. I also envision this recipe making some great cupcakes if you place a single pineapple ring in each cupcake slot.

 
3 Comments

Posted by on September 19, 2012 in Cookin', Desserts, Recipes


Tags: , , , , , , , ,

Recipe: Fig Tart

Fig Tart

Fig Tart


This Fig Tart is pretty damn close to perfection. It’s not too sweet and has a nice balance of flavors.

The key to this tart is two-fold. 1) Getting your hands on great figs. 2) Getting the frangipane right. If you don’t know what frangipane is, you’re in for a treat. It’s basically a pureed mixture of butter, toasted almonds, sugar and egg.

For the frangipane:

Ingredients:

  • 1/2 cup almonds
  • Assembling the Fig Tart

    Assembling the Fig Tart

  • 1/4 cup powdered sugar
  • 1/8 cup granulated sugar
  • 1 stick butter
  • 1 egg

Directions:

  1. Preheat oven to 350F.
  2. Spread the almonds on a baking sheet and roast for 10 minutes. Let cool on a plate.
  3. Put the cooled almonds and sugar in a food processor and blend until fine.
  4. Add the butter and egg and pulse until well combined.
  5. As you will only need one-fourth of the frangipane, you can store the rest in the refrigerator for a few days or in the freezer for about a month.

For the Fig Tart:

Ingredients:

  • 1 9-inch pastry dough
  • 10-15 large figs, quartered
  • 1/4 of the frangipane recipe (above)

Figs in the Frangipane

Figs in the Frangipane


Directions:

  1. Preheat oven to 400F.
  2. Roll out pastry dough to a 10-inch diameter and spread frangipane on the dough, leaving about one-inch of the dough bare.
  3. Arrange the quartered figs pointy end up in concentric circles on top of the frangipane.
  4. Fold the edges in, pinching to make sure they stick.
  5. If you want, brush with an egg wash and sprinkle with sugar.
  6. Bake 45 to 60 minutes or until edges are a nice golden brown.

Figs are very fragile, but they are worth working with when making this Fig Tart. It comes out flaky and will literally melt in your mouth.

Feel free to serve it a la mode, but it stands alone very well. You’ll forget all about Fig Newtons once you’ve had a piece of this Fig Tart.

 
2 Comments

Posted by on July 25, 2012 in Cookin', Desserts, Recipes


Tags: , , , , , ,

Recipe: Strawberry-Banana Bread

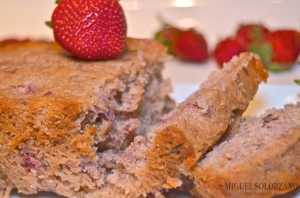
Strawberry-Banana Bread Loaf

Strawberry-Banana Bread Loaf

Is there a better fruit combo than strawberry and banana? I’m not sure there is after making and eating this Strawberry-Banana Bread.

The fresh Louisiana strawberries certainly didn’t hurt. This is a bread that will disappear very quickly. It’s perfect for breakfast, brunch or a mid-day snack.

Strawberry-Banana Bread

Strawberry-Banana Bread


Ingredients:

  • 1 1/2 cup sugar
  • 1 pint fresh strawberries, mashed
  • 1 stick of butter (at room temperature)
  • 2 eggs
  • 3 bananas, mashed
  • 1 cup plain Greek yogurt
  • 2 tsp cinnamon
  • 2 tsp vanilla extract
  • 1 tsp salt
  • 1 tsp baking soda
  • 2 1/2 cups flour
  • 3/4 cup chopped pecans
  • pinch of salt

Directions:

  1. Preheat oven to 325F.
  2. Grease 3 loaf pans.
  3. In a medium mixing bowl, cream together butter and sugar.
  4. Add eggs, mashed bananas and strawberries then set aside.
  5. In a large mixing bowl, mix Greek yogurt, vanilla and cinnamon followed by salt, baking soda and flour.
  6. Combine all ingredients and mix well.
  7. Stir in the chopped pecans.
  8. Divide evenly between the three loaf pans.
  9. Bake for one hour or until toothpick inserted in center comes out clean.
  10. Let cool in loaf pans for 45 minutes to an hour then slice and serve.

You can also freeze the loaves for later use like when strawberries aren’t in season.

This Strawberry-Banana bread is a great Spring treat. It’s one of the easiest bread recipes imaginable.

 
4 Comments

Posted by on April 17, 2012 in Breakfast, Brunch, Cookin', Recipes


Tags: , , , , ,

Recipe: Whole Wheat Mint Chocolate Chip Cookies

Milk and Mint Chocolate Chip Cookies

What Santa Really Wants for Christmas

Mint and chocolate make an awesome team. Probably only second to chocolate and peanut butter in my book. These Mint Chocolate Chip Cookies are made with whole wheat flour. Trust me when I tell you, you won’t miss the white flour.

The green mint chips pack a lot of minty flavor, but it’s balanced out well by the semisweet chocolate morsels. I happened to find the mint chips at World Market by accident, but I’m sure chopped Andes Mints will work just fine.

Ingredients:

  • 1 1/4 cup whole wheat flour
  • 1 tsp baking powder
  • 1/2 tsp salt
  • 1 1/2 tsp vanilla extract
  • 2/3 cup cocoa powder
  • 1 stick unsalted butter, softened
  • 1 tsp baking soda
  • 1/2 cup sugar
  • 1/2 cup brown sugar
  • Mint Chocolate Chip Cookie Dough

    Mint Chocolate Chip Cookie Dough

  • 1/3 cup milk
  • 1/2 cup semisweet chocolate chips
  • 1/2 cup mint chips

Directions:

  1. Preheat oven to 325F and line a baking sheet with parchment paper.
  2. Mix together flour, baking powder, baking soda, salt and cocoa in a medium-sized bowl and set aside.
  3. In a large bowl, whisk or mix together the eggs, butter, sugars and vanilla extract.
  4. Add the flour mixture into the butter mixture in two batches, adding in the milk between batches.
  5. Whole Wheat Mint Chocolate Chip Cookies

    Whole Wheat Mint Chocolate Chip Cookies

  6. Use a flat wooden spoon to work in the mint and chocolate chips.
  7. Scoop the batter onto the parchment paper-lined baking sheet in about 1-inch rounds. Pat down gently then bake for 15 minutes.
  8. Remove cookies from oven to cool for approximately 3 minutes. Serve.

You can make the batter in advance and store in the refrigerator for up to two days before baking. Just make sure to wrap it in parchment paper so it doesn’t dry out.

Even though I’m not a big chocolate fan, these cookies are great for the holidays and the green in the mint chips give them a nice pop of color. If mint’s not your thing, you can substitute any flavor of chip you can get your hands on. I’m thinking peanut butter chips would go well with this batter.

 
1 Comment

Posted by on December 19, 2011 in Cookin', Desserts, Recipes


Tags: , , , , , , ,

Recipe: Bacon Cheddar Biscuits

Bacon Cheddar Biscuit Dough

Bacon Cheddar Biscuit Dough

Biscuits from scratch can seem like a fairly daunting task. But don’t worry, this Bacon Cheddar Biscuit recipe is simple and you can go from step 1 to a finished batch in 45 minutes (cooking time included).

Rather than making plain biscuits, I added some bacon and cheddar to make this extra tasty. Feel free to add more cheese or more bacon if you so desire.

Ingredients

  • 6 slices bacon, diced
  • 1/2 cup shredded cheddar cheese
  • 1 3/4 cup flour
  • 2 TBSP cornmeal
  • 2 tsp baking powder
  • 1/2 tsp baking soda
  • 1 1/2 tsp sugar
  • 1 cup milk (I used 2%)
  • Frying Bacon

    Frying Bacon

  • 1 TBSP salt
  • 1 TBSP pepper
  • 1/4 cup chives, minced
  • 1 stick unsalted butter, frozen

Directions:

  1. Preheat oven to 450F.
  2. In a cast iron skillet, fry bacon until just crispy. Remove bacon with a slotted spoon and drain on a paper towel. Discard or reserve all of bacon grease except for 1 tablespoon and set the skillet aside.
  3. Bacon Cheddar Biscuits

    Bacon Cheddar Biscuits

  4. Whisk all the dry ingredients in a medium bowl. Use a grater to shred butter and toss in with dry ingredients. Using a fork, cut the butter into the flour until pea-sized crumbs form.
  5. Stir in the bacon, cheese, chives and milk. Using a fork, mix until no dry flour remains.
  6. Sprinkle some flour on a clean counter and dump the dough on it. Sprinkle some more flour on top and using your hands, pat the dough into a circle about 1/2- to 1-inch thick. Use a biscuit cutter or other round item (such as a jar or glass) to cut out biscuit shapes. Transfer cut dough to the skillet. Reform remaining dough and cut more biscuits until no dough remains.
  7. Bake the biscuits for 18-20 minutes or until a toothpick inserted in the middle comes out clean.
  8. Let biscuits cool for 5 minutes, then serve.

These biscuits go great with most meals. They’re especially an awesome way to make a breakfast biscuit sandwich.

No matter how you consume them, you can store them in a sealed container for several days. If you have any left over, that is.

 
1 Comment

Posted by on December 14, 2011 in Cookin', Recipes, Sides


Tags: , , , ,

Boston Cupcake Showdown: Cakeology vs. Sweet

I’m a fiend for cupcakes so while in Boston I sought out two of the best shops: Cakeology and Sweet. Both are in the same vicinity in downtown.

Cakeology operates in a single location on Province Street while Sweet has four locations throughout Boston. During my visit, I went to Sweet’s Downtown location on School Street. Cakeology’s shop has a nice interior seating area and it’s fun to watch the bakers out in the open. Sweet’s location is more boutique and feels like a more refined experience.

But I’m not reviewing the interiors, let’s get down to the cupcakes!

Cakeology's Carrot vs. Sweet's Organic Karat

Cakeology's Carrot vs. Sweet's Organic Karat

Cakeology’s Carrot Cupcake vs. Sweet’s Organic Karat Cupcake

Cakeology’s Carrot Cupcake was moist, but a little loose and I didn’t taste many carrot cake elements that I’m used to. I was hoping for more texture inside with shredded carrot, coconut or walnuts, but it wasn’t there. The frosting, however, was great. It was very light and fluffy and had the perfect cream cheese finish.

Sweet’s Organic Karat Cupcake was a little on the dense side, but it was packed with more carrot cake elements. The diced pineapple really sent it over the top. However, I found Sweet’s frosting on this cupcake a little grittier than I would have liked.

Overall, I have to give this one to Sweet. The carrot cake elements were there and the pineapple was a pleasant surprise and gave the cupcake more texture. That said, if I could put Cakeology’s frosting on the Sweet cupcake, I would have had close to the perfect carrot cake cupcake.

Cakeology's Pumpkin Spice vs. Sweet's Pumpkin Pie

Cakeology's Pumpkin Spice vs. Sweet's Pumpkin Pie

Cakeology’s Pumpkin Spice Cupcake vs. Sweet’s Pumpkin Pie Cupcake

First up, Cakeology. I didn’t get a lot of pumpkin from this cupcake. I know pumpkin is a subtle flavor, but this cupcake was lacking for me. The frosting was also a little loose. I did like the decorative pumpkin candy on top to give it a pop of color. But, I wouldn’t recommend this cupcake.

Unfortunately, Sweet’s Pumpkin Pie Cupcake wasn’t any better. Once again, I didn’t get much pumpkin, but I did pick up on the nutmeg and cinnamon aspects. The frosting was creamy and tasty, but it really overpowered the cupcake itself especially the subtlety of the pumpkin.

I wish I could, but I can’t recommend either of these cupcakes which is a disappointment because it’s Fall and everyone could use more pumpkin in their life. There’s definitely room for improvement for both shops on their pumpkin offerings.

Cakeology's Red Velvet vs. Sweet's Red Velvet

Cakeology's Red Velvet vs. Sweet's Red Velvet

Cakeology’s Red Velvet Cupcake vs. Sweet’s Red Velvet Cupcake

Red Velvet — the golden standard of cupcakes. I’ve always been baffled by how the red coloring seems to add unexpected flavor to a light cocoa cupcake. It’s got to be purely psychological.

Cakeology’s Red Velvet Cupcake was delicious. The cupcake itself was moist with a definite hint of cocoa. The frosting was creamy with just enough cream cheese flavor. Put those two together and you’ll see that Cakeology has a damn good red velvet cupcake.

Sweet’s Red Velvet Cupcake was a letdown. The cake was too dry (I tasted all of these cupcakes the day I bought them) and stuck to the roof of my mouth. Tastewise, it didn’t have the hint of cocoa I was hoping for. Aside from the cupcake, the frosting was gritty (much like the carrot cupcake) and there was too much of it in relation to the cupcake. I like frosting, but it needs to be used in proportion to the cupcake. Otherwise, the frosting can overpower the cupcake — that’s what happened here.

Cakeology’s Red Velvet Cupcake wins this particular battle by a wide margin.

Overall, these are two delicious cupcake places in Boston. Each with its own specialties and approaches to the cupcake world. After tasting both shops’ cupcakes, it’s a tough choice. I can’t really tell you to pick one over the other, but I can recommend Sweet for its Organic Karat Cupcake and Cakeology for its Red Velvet Cupcake. I wish I had more time to evaluate all of the offerings these shops have. Guess I’ll have to head back to both next time I’m in Boston.
 
Leave a comment

Posted by on October 11, 2011 in Eatin'


Tags: , , , , , ,